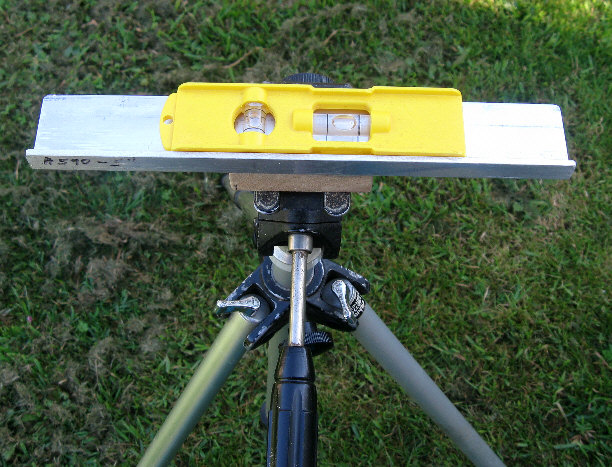
A modified OWL 'scope
(before the septum was painted dark gray) (View by Ralph Reiley)
![]()
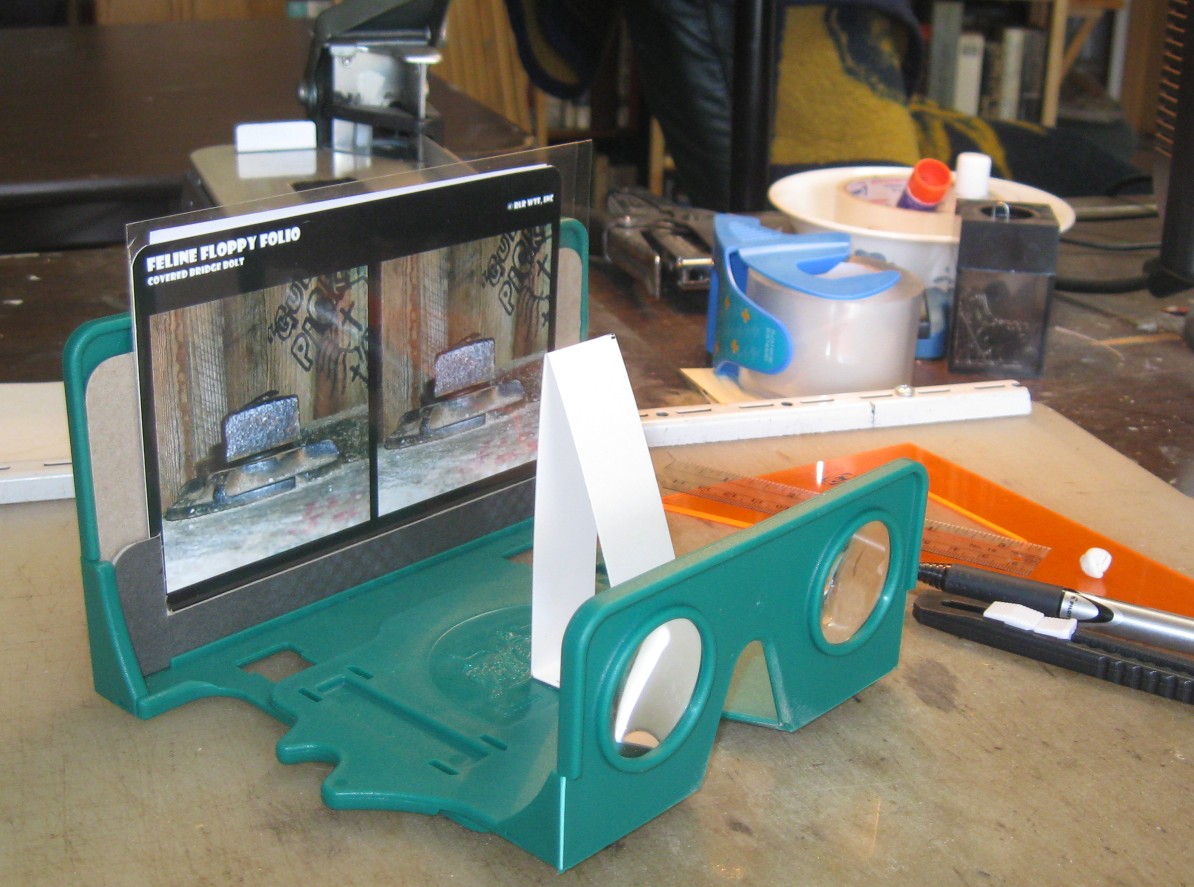
This page/section attempts to anticipate the normal resources and questions of people trying to compose (3D) stereographs (aka: "view cards" or just "views"). It mainly presents 5 inch (wide) format stereographs since 7" format stereoscopes are expensive, while 5" 'scopes are give-away affordable --to purchase and to mail.
However: the fine work being done by Sir Brian May (through his "London Stereoscopic Company") and members of my circuit in the Stereoscopic Society of America --prompts me to urge consideration of Sir Brian's "OWL" Stereoscope and the ubiquitous 4x6 inch (aka: "4R") print format --for which the OWL's 3 inch spaced optical centers seems ideal. (A standard Holmes-Bates-Keystone-NSA scope's prismatic OCs are closer to 3.5 inches apart.) Simply scale down my specifications for 7 inch format to about 86% (it's not critical). You'll need to make some sort of a 6 inch card carrier/adapter for the OWL. (A thin-ish 7-1/16 inch wide backing card pops nicely into the OWL's stage. Something like photo album corners on the front of it then holds the 4x6 --that 4 inches being trimmed to any height.)
![]()
Stereography is an art form older than photography. Sir Charles Wheatstone had to draw stereo pairs by hand to illustrate his discovery and descriptions of stereo vision, since the invention of a practical camera was still a few years in the future.
Let's first get a grasp upon "the stereo window" --via Dr. Dale Hammerschmidt's illustrations --taken from "A Stereo Photo Glossary" (which see for any unfamiliar terms here).
(Just skip ahead if you're okay with the "window".)
It's surprising how hard this simple concept is to get across. Those who do understand the "stereo window" (and no special intelligence is required) --are (and despite their own initial problems) --consistently amazed at how hard it is for others to grasp.
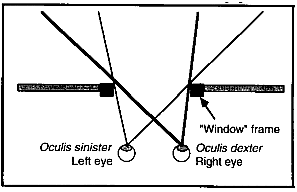 What
we have here is an over-head view of you --standing in a room --whilst
gazing out of a rather small window. When trimming/cropping a stereo pair
of images ---we try to replicate what each eye sees --though just such
a window --onto the world. Each of the two prints in a stereograph corresponds
to the view of each eye --the left-to-right extent of what each eye sees
--through that small pane of clear glass.
What
we have here is an over-head view of you --standing in a room --whilst
gazing out of a rather small window. When trimming/cropping a stereo pair
of images ---we try to replicate what each eye sees --though just such
a window --onto the world. Each of the two prints in a stereograph corresponds
to the view of each eye --the left-to-right extent of what each eye sees
--through that small pane of clear glass.
Obviously: because of the different angle of each eye, they see somewhat different "takes" onto the world beyond the window --because the pane is near and the scene is far.
But we'll let Dale explain it to us:
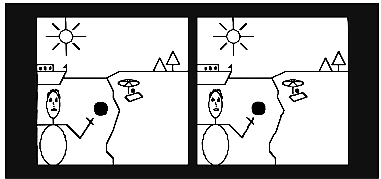
* The Stereo Window (of a view): A basically simple concept that for some reason is not intuitively obvious, and causes no end of confusion to newcomers to stereography. If one views a stereograph, it is generally most comfortable if it is mounted in such a way that one appears to be viewing the three-dimensional image as though through a window. This mythical window is the "stereo window." If one does not mount stereographs in this manner, the edges often have a distracting "choppy" or "floating" appearance to them. The way it works is outlined in the following figures, in what we hope to be an informative manner:
.
As you can perhaps appreciate from this illustration,
an object on the far side of the "window" will appear
to be more to the right in the right-hand image (that
is: have a wider margin on its left side) and more to
the left in the left-hand image (have a wider right-hand
margin). Just the opposite is true in an object which is
closer to the observer than the "window". [end direct quotes]~~~~~~~~~~~~~
When viewing through a window, the right eye sees a bit more to the left --and the left eye sees a bit more to the right. Trimming and mounting stereographs correspondingly will create an apparent "window" through which one views the scene. The most comfortably viewed stereographs are those in which all in the scene appear to be on the far side of the "window". Exceptions can be made for objects which appear to pierce the window pane, as long as they don't cut into the left or right frame edges.
~~~~~~~~~~~~
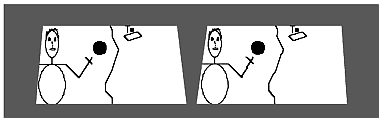
At left is an example of an object (the blob) which appears to be behind the "stereo window". (Use your small "finger lorgnette" or "free view" to see this pair.)
In life (as Dale's just told us), the blob appears further to the right --when looking with just your right eye. That's simply because your right eye is further to the right --and distant objects appear to "track" with one's moving point of view --much as the Moon "keeps pace with you" while driving along a straight road at night.
BUT: in picture pairs (designed to be mentally "fused" --seen, each, with just one eye) --this "window pane" eye-shift effect is simulated --simply by trimming the two prints inward on their outside edges --as might be needed* to produce the appearance of a close window. (* Real stereo cameras are designed to clip those edges off somewhat --right on the negatives or sensors.)
Why bother? --Because the picture pair has to stop SOMEwhere --and it might as well be done right --or else you'll get scene detail appearing to be cut away and floating in front of the window's frame edges, which results in visual confusion.
Here we see the blob again --but its clearly in front of the window, and yet: there's no problem in viewing it.
Reason: the object/blob doesn't cut the window's edges. It's "reasonable" that the blob can come through the window --as long as it doesn't tear into the window's frame by doing so.
If you measure the distance between the left and the right appearances of the blob (left edge of it to left edge --say), you'll find that this distance is less than when you measure the spacing between the same edges of each window frame. It's now the WINDOW which appears further away --because it appears to be more stationary when your vision shifts from your left eye to your right eye. (Sorry: this "window" explanation might be getting to the point of over-kill for you.)
(* If you've read this far w/o fusing the pairs, either stop and learn how to "free view" or order yourself up a stereo lorgnette. (Strong reading glasses might not work, since their prism power is inward.)
~~~~~~~~~~~~~~~~
--I've reduced the pairs here to an easily fused format.
This stupid looking drawing will help to avoid confusion when I refer to scene elements.
"Window Reversal": * Some critics will say your have "window reversal" if any subject matter is seen to appear in front of the stereo window. However, in this section we show how that can be reasonably done.
* Most people who know stereography will use that term if subject matter is seen to be "cut off" by the window. What that means is: there's an impossible relationship in which subject matter that's clearly (stereo-visually) in front of the window, is never-the-less blocked by the frame of the view's window --a window that appears to be further away --maybe even at the view's "infinity" or beyond.
The solution is to cut away the outer edges of the frame pair: some off the left edge of the left frame, an equal amount sliced off the right edge of the right frame. You can easily mask the pair first to see how much you need/want to remove.
"Infinity Separation": This is the actual (ruler) distance on the card between the same item in the farthest distance in both prints ( which details are called "homologous points at infinity").
Obviously, anything you're able to stereograph is less than infinitely distant, but anything more than 100 yards away is as good as "infinity" in normally stereographed views. "Hyper" pairs can reach out much further in conveying depth, but the separation of those distant points --as mounted on a view card, should still be at your "infinity standard" --for the kind of cards you're making.
When nothing approaching infinity is in the stereo view at all (an interior shot, say), you might want to set the furthest subject matter to less than infinity card separation --but that's not important.
In these illustrations, the Sun is a safe bet for stereo infinity, ya?
Normally, you trim a pair for a good "window" (defined by the two frame lines in my illustration --which represent the edges of two borderless photos), then mount them onto the card --such that the Sun-to-Sun distance is within some infinity separation tolerance.
For viewing a 5 inch card pair in a "V6" series scope (or just using its lenses as a "finger lorgnette"), the infinity separation can run from 2-3/8 to 2-5/8 inches (which includes a gap of maybe 1/8 inch).
So once you've selected your separation and gap, you've also selected your maximum print width. The pair can be considerably narrower --often with pleasing results, but it can't be much wider. To maintain your (distant) separation standard, narrow print pairs will (of course) use a wider gap.
The height of the pair is up to you: whatever suits the subject and the card stock. (V6 series viewers for 5 inch format allow up to 3 inches --above the viewer's floor.)
The Window: You can imagine the borders/frames/stereo window of the prints to be just more scene elements, but ones that you can control through trimming and cropping. Here the corresponding sides (left to right) of the frame lines are closer in separation than all the scene elements except the ball --which consequently appears to come through the stereo window.
The stereo window/frame lines can be quite flexible: The frame lines which describe the stereo window might be even be circles or ellipses. Obviously, computer graphics programs are better suited for fancy work than a razor knife, but the "spirit" of good stereography (IMO) doesn't seek to call such attention to itself. The stereo print pair "wants" to be a humble, graceful witness and window onto our experiences of life. 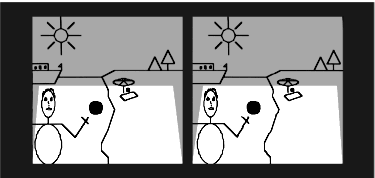

Here's How:--and here are the tools: (and here is an update)
You don't need the Scotch tape (that's 3M's "double-stick" on the right --good stuff) or that 2" wide roll of plastic carpet tape. I've gone to "Elmer's" brand "2X" "Glue Stic". It goes on surprisingly smooth/even and doesn't show lumpiness with Canon brand dye-sublimation, glossy prints. Apply it using ever renewed clean scrap paper (to catch the over-spread), while holding down the print tightly with 2 fingers. Gauge coverage by watching reflected light. Then immediately place the trimmed and glued frame, rubbing it down through more clean scrap. (More on that in the steps below.) 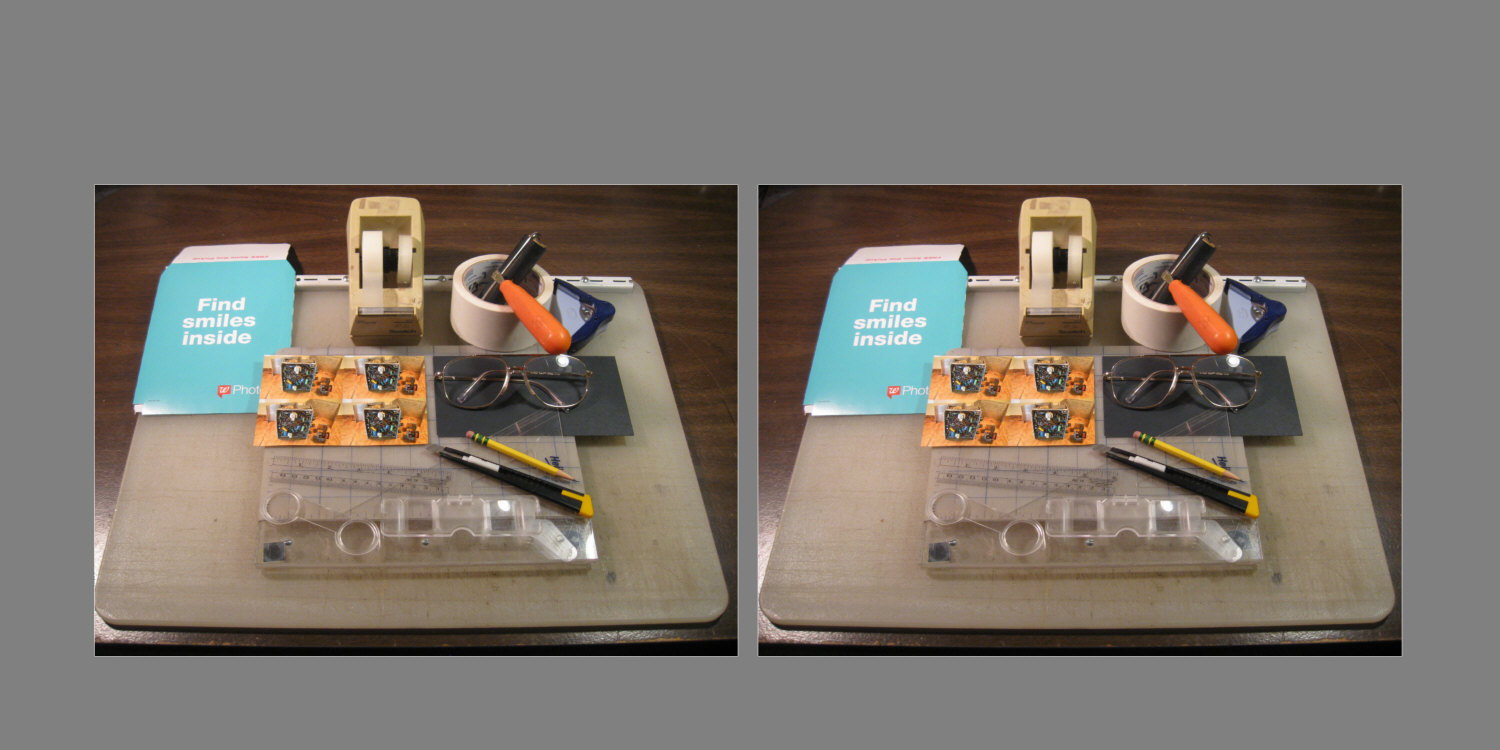
(click to enlarge)* Glue stick stickum is water based. The downside of that: serious dampness might cause it to fail. Upside: any glue that gets on the photo side of your laser or die-sub print will wipe right off with a slightly damp cloth. (Best not do that with most inkjet prints.)
Sticking out of the carpet tape is a "brayer" (as its called), originally used to spread ink, or to really wring two glued surfaces together --but you don't need that either. Again: just put a piece of stationery over the print and rub it down.
If you free view, and especially when working with 5 inch format, you probably don't need those lens pairs ("lorgnettes").
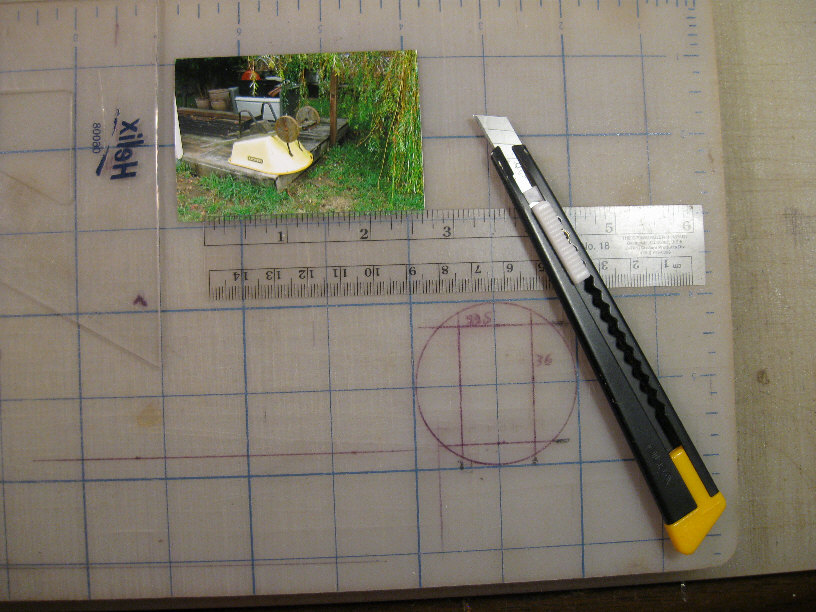
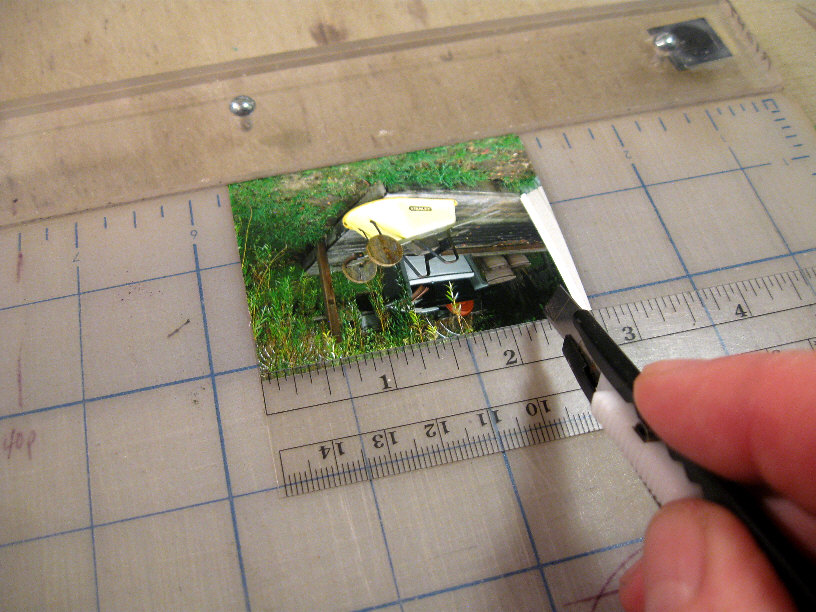
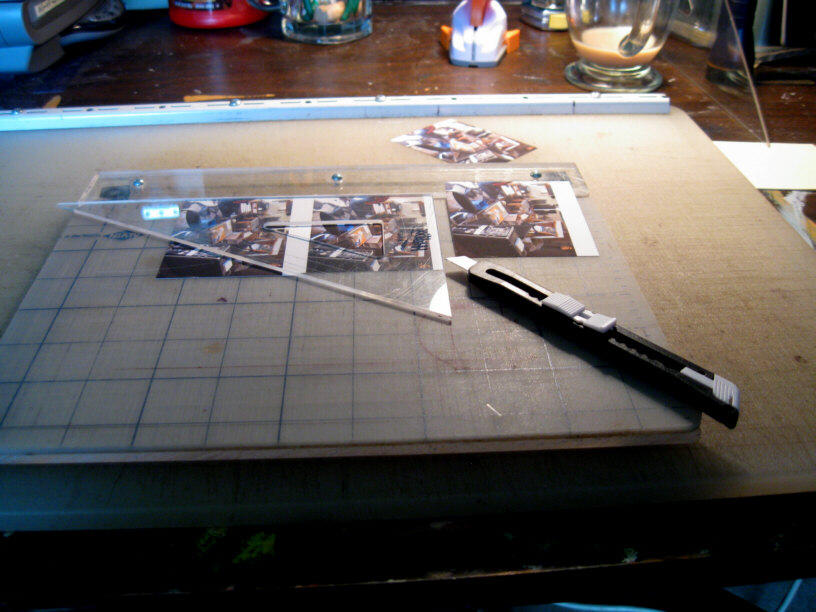
Barely visible (under the break-away razor knife^ and pencil) is an 8 inch 30-60-90 drafting triangle. You need that --and a 12 incher too. For me, that thin, flexible, transparent, flexible, 6" shirt pocket ruler is a "vade-mecum". You also want some kind of a good 12 inch ruler. I cut mine off at precisely the zero index --which comes in handy.
^ You want the kind of razor knife pictured --which is hard to find in stationery stores/departments now days, but are 3 for $1.25 at your "dollar store". Straight away, make yourself a "sharps" disposal out of a coffee can and its lid --with a small hole in the middle.
The lorgnettes, knife, ruler and triangle are resting on a "cut-upon" mat. I've added a thick straight edge/stop, against which you slide the prints that you're trimming and the drafting triangle. Everything here is resting on a large cut-upon (also with an added straight edge), which is really handy for cutting up paper stock to size.
Upper left we see a Walgreens print envelope, four 2x3 inch images on a 4x6 borderless print, and a 7 inch wide black card to mount a stereo pair of prints on (except that: the card should really be gray and 5 inches wide). (I was originally going to make this tutorial for both 5 inch and 7 inch wide views.)
** I'm trying to bypass Walgreens, computers, and graphics programs --by using a Canon CP-1300 printer, these steps , and manual trim-and-mount methods. (That model number is probably already obsoleted, so look at other 4x6 printer models and brands as well.) I found the 1300's menus and buttons to be rather un-intuitive. While the borders/no-borders option works (on 1-ups and 4-ups, anyway), the setup display doesn't change. Walgreens also has rather inscrutable menus.
* Get some "110 pound" (or so), 9 mil (or so), light gray "posterboard" or "card stock", then cut it down into 5x6 inch rectangles for "bifolders", or 3x5s. (That's what the big cut-upon and triangle are for.) If you have to buy large sheets, maybe the (art supply) store has a large cutter, but make sure it's square.
* I've been using a desktop printer and white or gray 8.5x11 posterboard --for printing the verso and the front half of the 5x6 (unfolded). Walmart sells gray, 9 mil card stock at 30 12x12 inch sheets (six in each of 5 shades) for only $5 --but: it's only printed gray --not solid gray, so you can't erase trim marks.
Those reading glasses help a lot --even if you have young eyes.
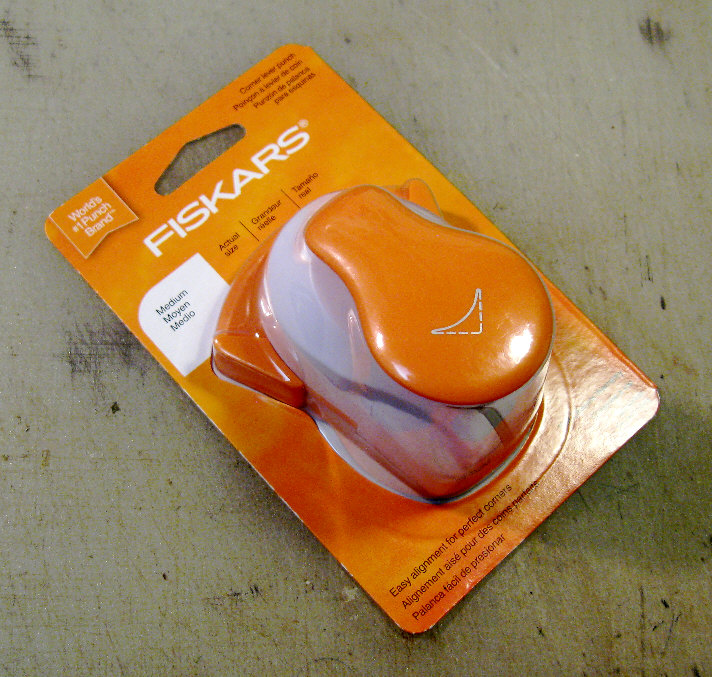
* That blue thing is an inadequate corner rounder. It's just good enough to corner-round 9 mil photos. I normally use a tough old "Lassco Model 20" with a 3/8 in radius cutter, which costs well over $100. (It can corner-round 50 mil mat board!)
I bought a "medium" radius (about 5/16"), Fiskars brand corner rounder (because the "large" radius one wasn't in stock). It managed 24 mil and the folded 9 mil ("110 pound") poster board I'm using for this "Practical Stereography" project. (Yes: you really should have a good corner rounder.)
The firstest step is to get some stereo print pairs to work with.You'll be "trimming and mounting" photo paper print pairs, using a razor knife^.
Take some "weight shift" pairs (or better yet: slide bar pairs)
--with an affordable digital camera^ or your cell phone's camera. Keep the two shots level to each other and homed against the slide bar. Resist the urge to "toe in" on the main subject. (That's for your eyes to do when looking at the finished print pair view.) ** If your camera^ has flat back and bottom surfaces, this slide bar (even if you just level it by eye) can help prevent toe-in/mis-aiming, different heights, and rotations between your left and right photos.
* Back-up shots are nice if you can easily match up the pairs afterwards. It helps to always take the left frame first, next the right frame, then take a shot of your shoes before taking another left-right pair of the same scene.
Next: get some "wallet size" prints of the selected left and right frames. (Walgreens lets you place four 2x3 inch frames onto their 4x6 inch borderless prints --via the "Edit"/"other" options when in the default "fill" and 4x6 mode. That wallet quad option occurs early in Walgreens' menu options.)
^ I own a really nice digital stereo camera: a Fuji W3. It works well with the computer application "Stereo Photo Maker" to turn out correctly formatted and trimmed view pairs through my desktop printer --or maybe to fetch ready-to-view pairs onto 4x6 prints from Walgreens. The last time I tried to use my W3, however, the proprietary battery was dead and (oh-oh) the spare was still cooking in the charger --too swollen to any longer slide into the camera. I placed the dead battery into the charger and it came up to "full" in 2 minutes (ohdear). Meanwhile, the AA batteries in my old Canon A590 hand camera were holding up just fine --plus I have a dozen charged-up replacements. So: it seems that I've become strictly a "weight-shift" stereographer.
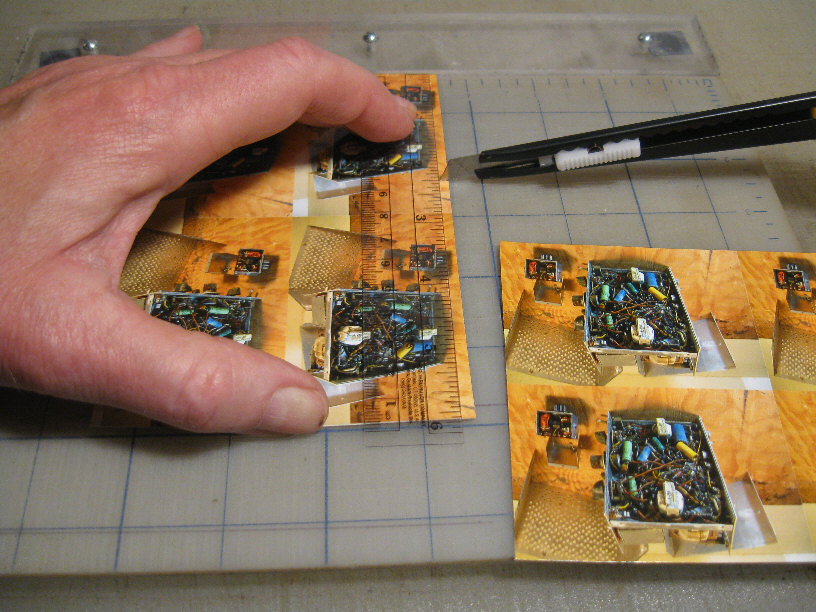
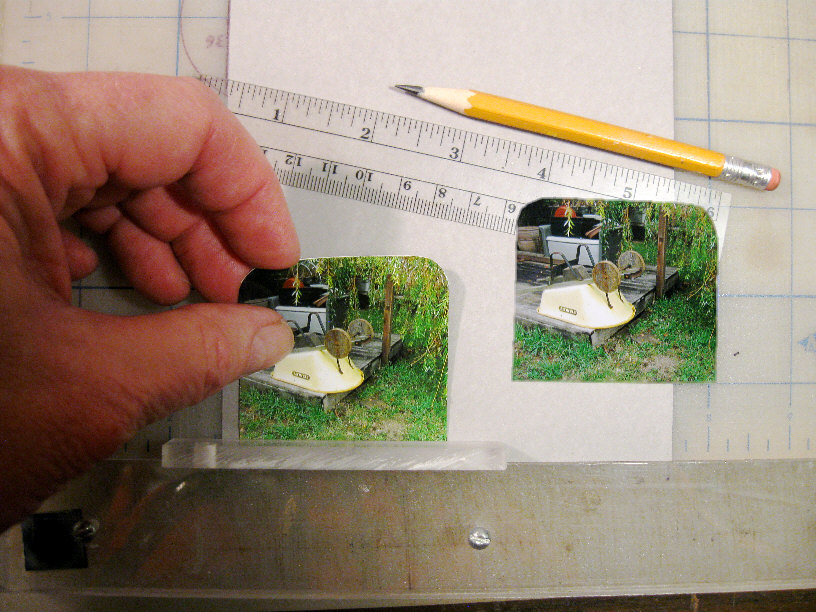
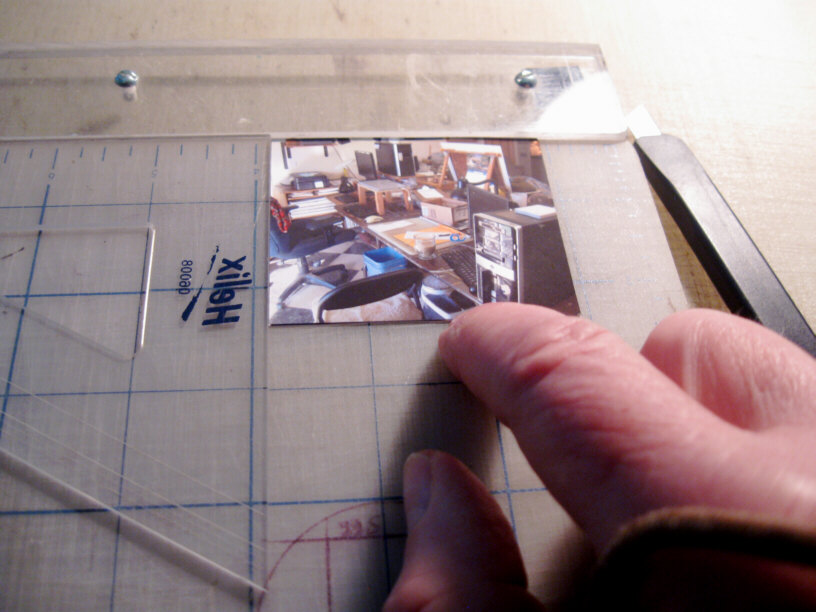
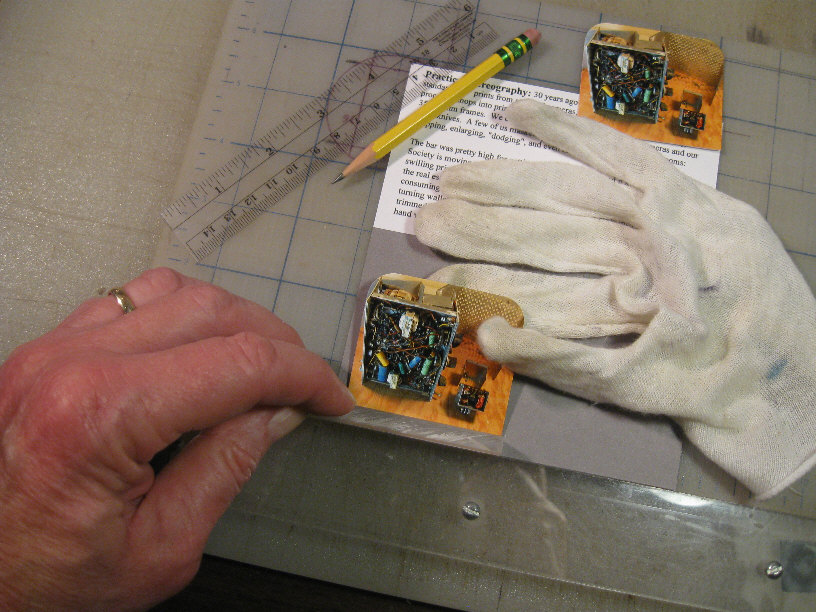
(1a) Now the glove represents my right, ungloved hand --holding the corner-rounded left print snug against one last tool: a 1/4" thick plastic second straight edge --in order to space the (trimmed, ready, visually checked and peeled) print up from the bottom of the gray card. There's a faint pencil mark at the center of the card, from which I space the left and right prints equally (by eye) for about a 1/8 inch gap between (or wider, for a narrow print pair).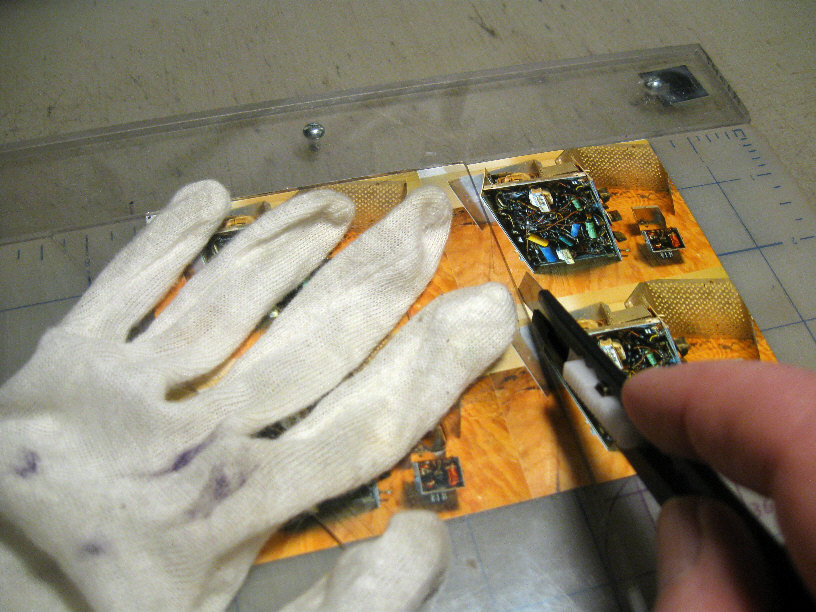
Mark the left and right quads the same way on the backs: "L1, L2, L3, L4; R1, R2, R3, R4" --even though you won't necessarily match them up that way. Then cut the wallet photos all apart on their 2x3 frame lines. (Don't be a
dummy like me --in this photo-- and try to finish trim two frames at once.)
(1b)

Here he's finally doing it right: trimming on the frame lines (with an 8 inch 30-60-90 drafting triangle).
(2a)
Pick a detail that's closest --like the lower right corner of that
shadow, and trim the right edge of both the left and the right prints to the
same distance from it (trimming the right frame just a tad closer to the shadow).
(Before trimming the right edges, try to leave about 2-1/4 inches to the left edges,
but a narrow pair of trimmed prints is just fine --with a wide gap/"septum" between.)
(2b)
That nearest hanging willow tree branch looks about right. Parking the 2-1/4 inch mark on it
gives an idea of where the left cut would fall --and that looks good too. Since the two JPEGs
which make this view were broken out of a Fuji-W3's MPO image file (a Stereo Photo Maker
graphics program option: "Save Left/Right Images"), they're a close enough match so as to
pose no worries about leveling (vertical registration) or a rotational difference. Again: trim
the right frame/print a tad to the left (closer) than the 2-1/4" mark.
(3a)
Measure over 2-1/4 inches (or less) to what will be the left edge of each print and mark with a scratch. Then trim the left edge of each print to the scratch. (Big Stupid's at it again here --trying to trim two frames at once.)
(3b)
So OK: the willow tree branch cut has been made, now the scratch mark at 2-1/4 inches.
(4a)
Make sure that the card, the spacing tool and the print remain snuggly homed against the guides --before laying down the print frame. (Yes: one is deftly holding the sticky back print at the edges, trying not to get lint/dirt under the print, so don't wear a white cotton glove. Commercial laser prints prints
wipe clean of finger prints --so do Canon dye-sublimation prints. Have clean and dry hands.)
(4b)
Look Ma, one hand!
(You get one chance to lay it down right.)* Again: keep your work area/surfaces clean. A speck of dirt under a gloss print makes for an ugly looking bump.
* Follow the glue stick advice (above) at the start of this section and place the trimmed prints.
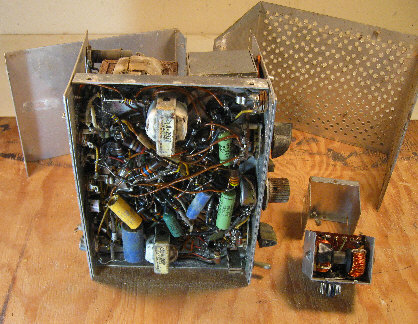
* The "extended legend" could be a printed 3x5 appliqué, or simply hand written (on a light gray 5x6 card). (Again, and save for the photo pair, I ink jet printed the whole 5x6 card and its gray half together for the electronics view.)
You can fold the "extended legend" over (it then becomes a "verso") or leave it straight up ("study card" style). If you fold it over, do so precisely, then corner-round the view while folded, which gives it a nice appearance and simulates a traditional stereograph.
(6)
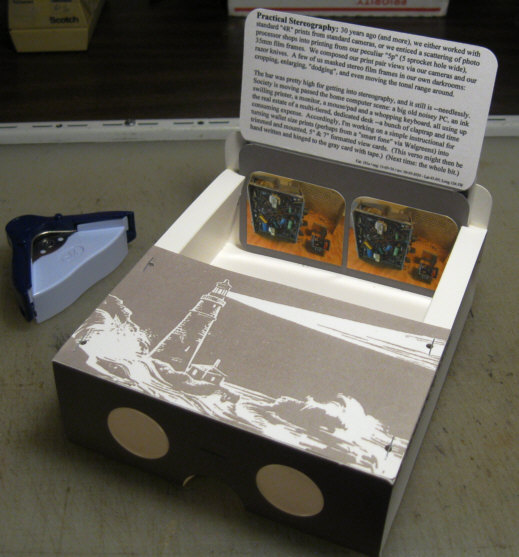
And there you have it.
(click to enlarge)
Here follows the making of a 7 inch (wide) format view (or: stereograph).
(But digital graphics stinks --much less so when using "Stereo Photo Maker".)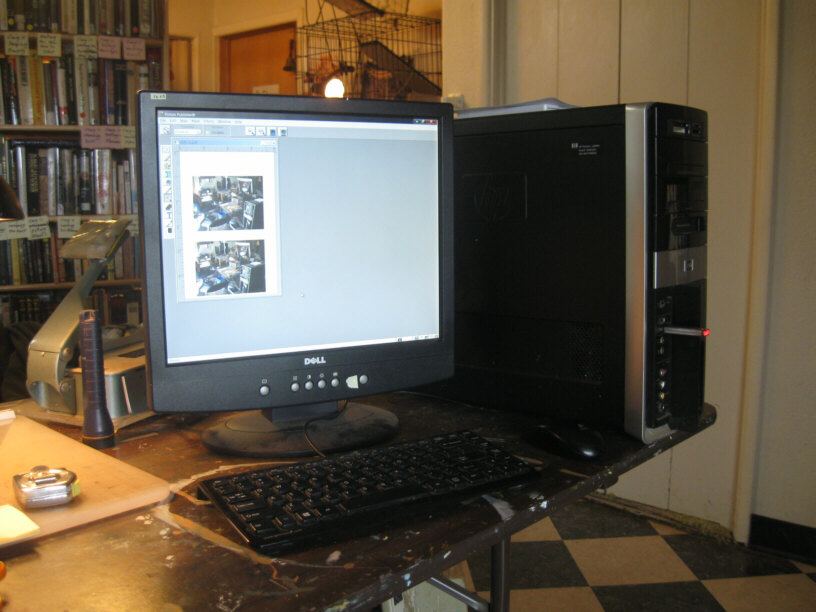
Using a graphics program/application, I've fitted the left and right images into a 4x6 inch field.
If you went to Walgreens to do this, you might have fitted your camera images into the 4 inch width of
two separate 4x6 fields, perhaps specifying a white border, to make the images smaller (less to crop away).
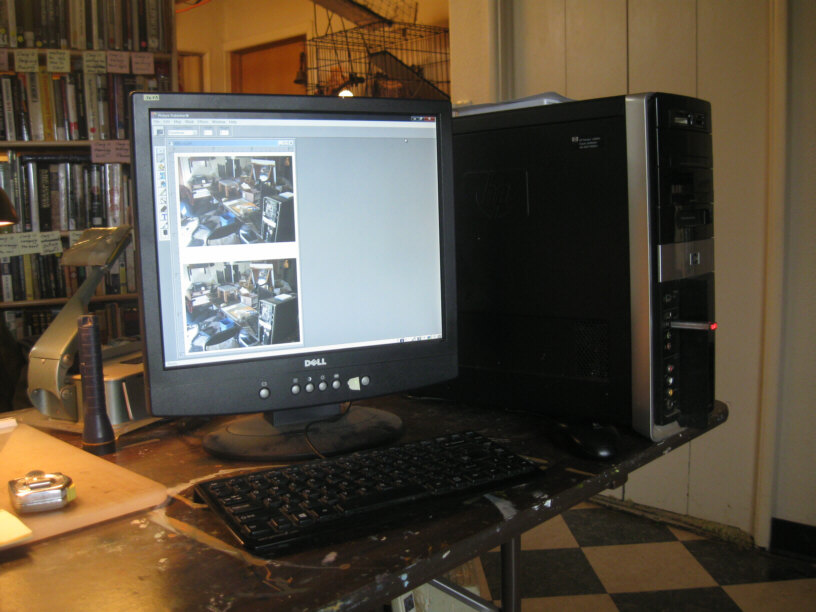
Since this is partly a digital graphics trip, I masked and cropped away nearly all but the image pair.
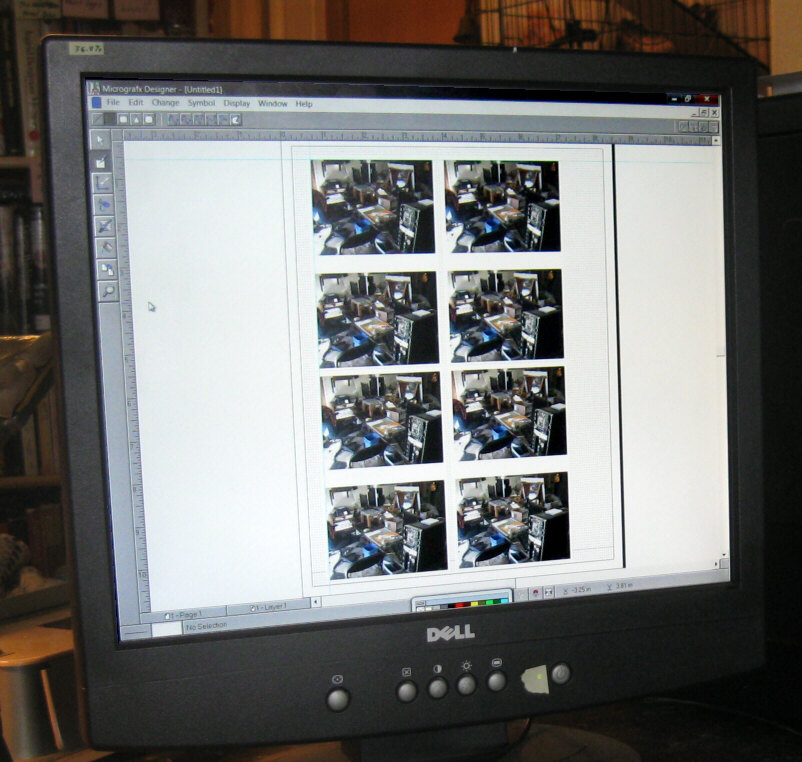
Then I copied the pair and pasted it 4 times into an 8x10 inch space --for to print it out to a sheet of
matte surface photo paper (which is less likely to show my fingerprints and sneezes as I handle it).
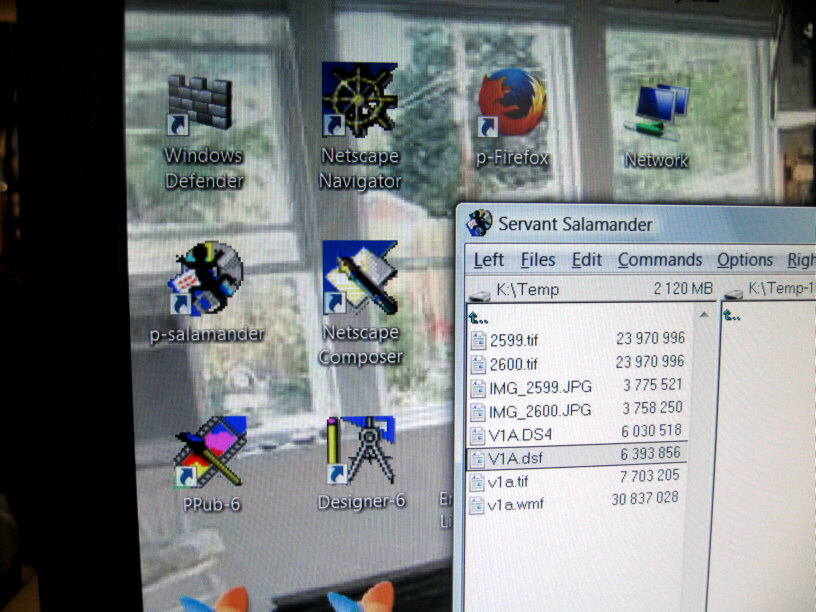
"v1a.tif" is the original (over and under) print pair, saved and resaved as a lossless "TIFF". A "v1a.bmp"
would be okay too. That "DS4" version is the first save (from Micrografx's "Designer-4" application) after
I pasted 4 copies of v1a.tif into a page sized field. Then I opened the DS4 into Mgfx's "Designer-6"
(to be saved again as V1A.dsf), which application is capable of "exporting"/converting a DSF into an old
format called a "WMF", or "Windows Metafile", which is the only format in common with the (freebie)
page maker "LibreOffice-Draw" --an up-to-date graphics application which is new enough to run on
Windows-10 and to fully support my newish "Brother" brand (affordable) office printer (an MFC-1985DW).
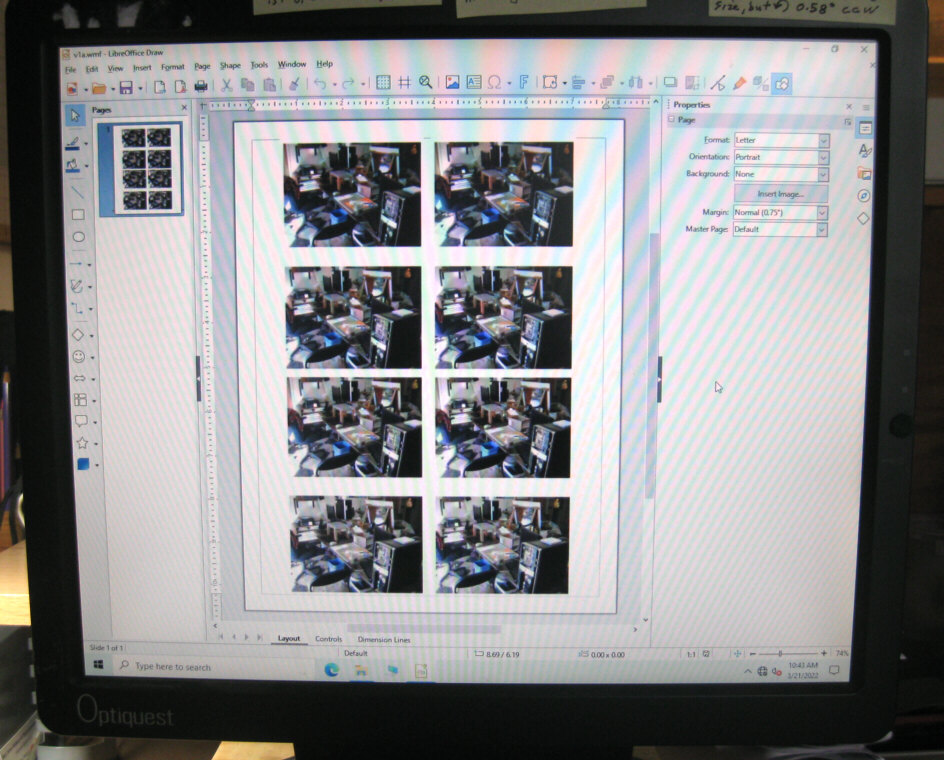
So here's the v1a.wmf, displayed via LibreOffice, running under the Windows-10 computer (which I keep 99% off-line).
And here's the nice print-out. Aside from shrinking to 97% of the specified size, it looks perfect --AND a
tad sharper, with a tad less "image structure" (dither/grain) than I use to get running under the XP computer.
You might achieve a similar output at Walgreens by specifying a 4x6 or 8x10 field of "wallet size" (2x3 inch,
prints, maybe to make 5 inch wide views), but each 4x6 or 8x10 has to be all "lefts" or all "rights" (of course).
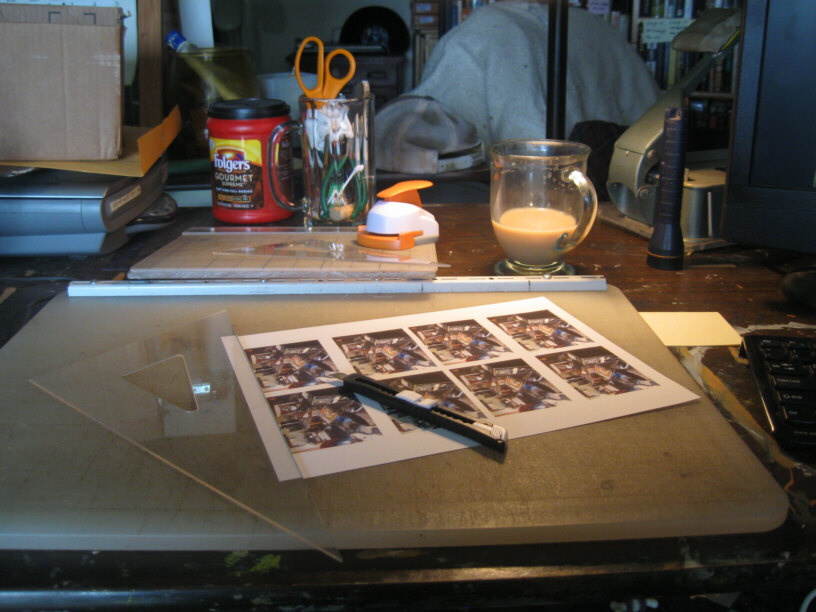
Time to cut them apart. You might want to first cover the back with (peel-off, double-stick) plastic carpet tape,
such that it will neatly trim with the print pairs. "Glue Stic" or Scotch/3M brand office "double stick" tape
applied afterwards works too. (You only get one chance to get it right with double-stick tape.)
Unseen here is the left print, knocked exactly together with/under the right print, but turned upside down (so
as to be cutting its left edge) --such that by trimming to that right print (and right edge) near point (the Post-a-Note pack,
atop my Vista computer), I'm also trimming the left print --for size and window depth. This is all in order to keep the
"stereo window" a bit closer than the nearest subject matter.
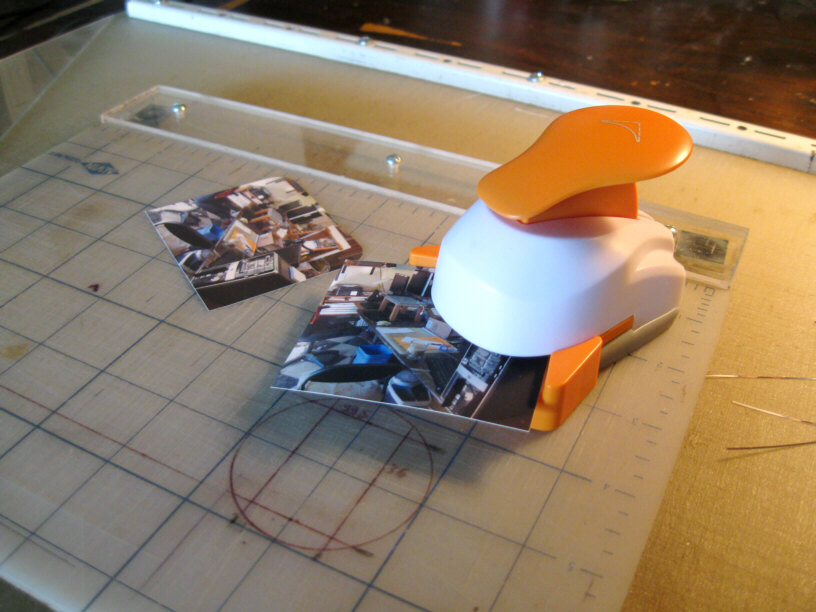
It's easy and affordable to corner-round the top corners, and looks so nice. (The corner rounder was purchased
at Jo-Ann Fabrics and might not be quite up to corner rounding prints with carpet tape, so use "Glue-Stic". A
"Lassco" Model 20 will do the job and last forever --but is costly. Look around for alternatives.)
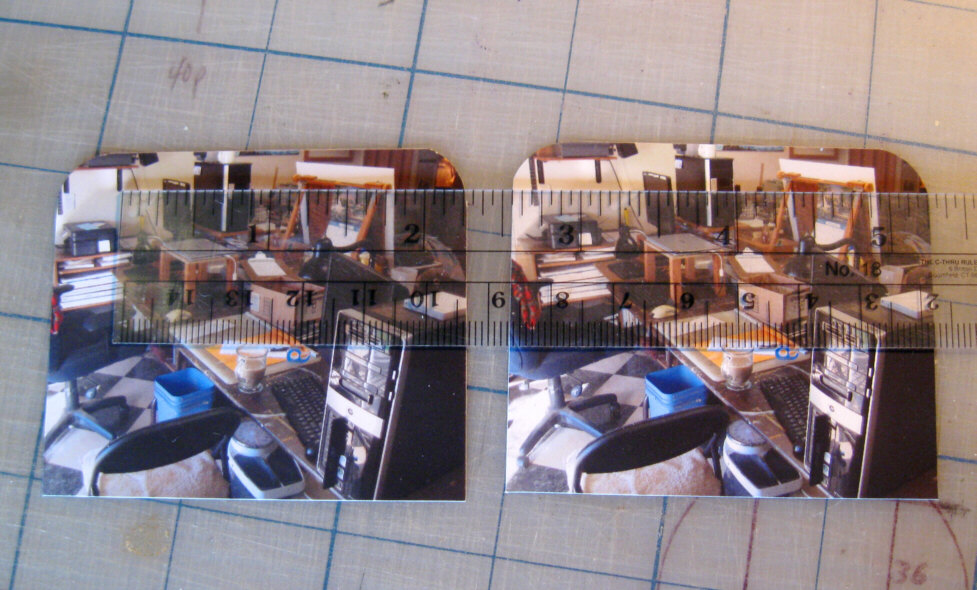
Sizing the pair up --for the gap/"septum". For 7 inch format stereographs/"views", the far point is comfortably
viewed/"fused" (in a traditional stereoscope) if kept under a 3-3/8 inch span on the card (as trimmed and mounted),
but 3-1/4 inches is better/safer, since novice folks tend to pull in the stage for a closer look, thereby losing a
lot of the 'scope's prism power (which spreads the lines of sight from our 2-1/2 inch spaced eyes). Since the
"far point" of this view is a wall, just 12 feet away, I set the view's far point at 3-1/8 inches --which separation
requires a healthy gap of almost 5/16 inch. (Horizontally measured dimensions are not critical, but vertical
agreement is, and this pair look good in that respect. Use a slide bar, two identical, time synchronized cameras on a bar,
a real stereo camera, or very steady eyes and hands as you "weight shift" a stereo pair.)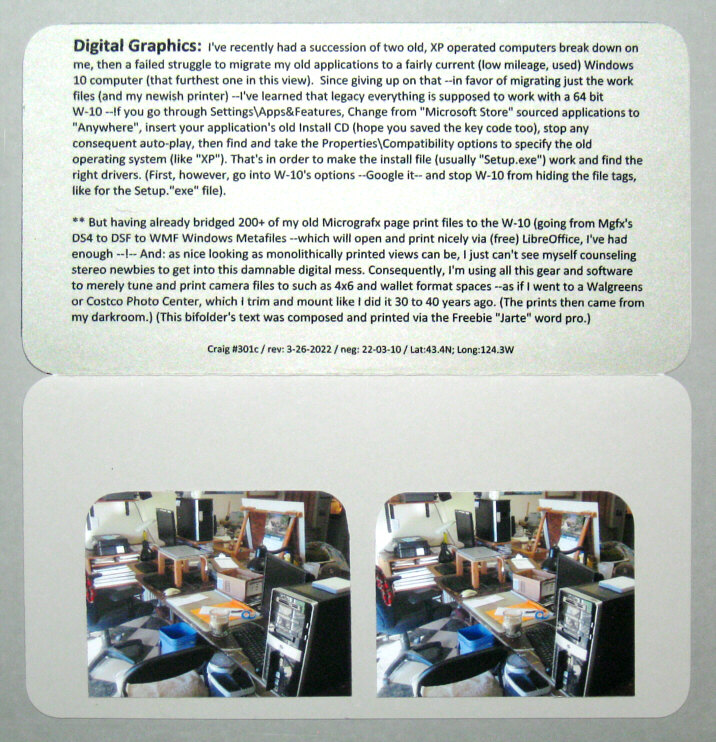
This view is a front and back "bi-folder". Without the fold (or unfolded, as shown) it's a "study card".
Here's an update (as of January 15th, 2023)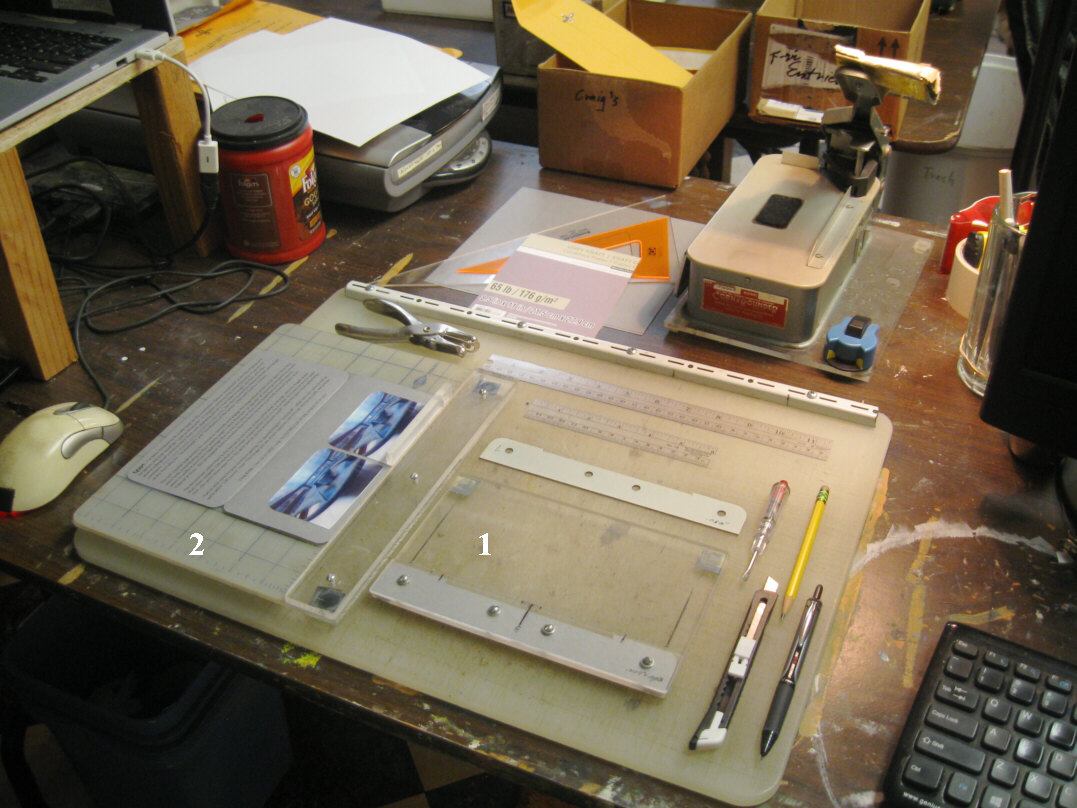
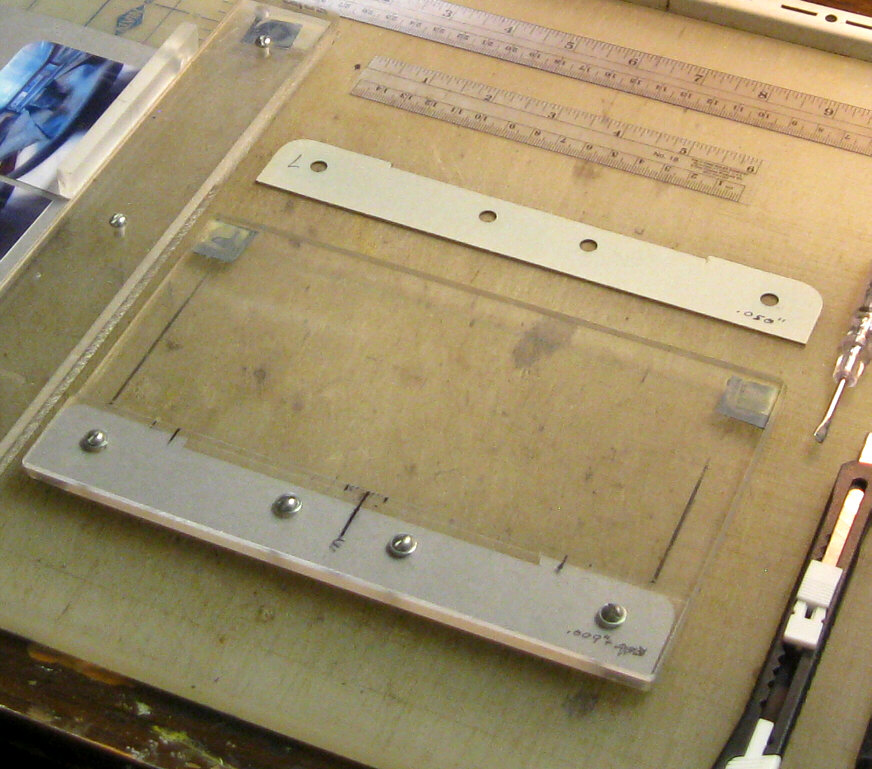
(click image to enlarge) (click here to enlarge Jig #1)* 5 inch formats (and give-away cheap viewers) are great for "publishing"/gifting one's work, but too small as circulating "bifolders" in our Stereoscopic Society of America folio circuits. The fold-over verso/legend needs a traditional 7 inch wide space to accommodate circuit member comments. Consequently, I brought my 40 year-old mounting jig (#1 in the above image) out of retirement and refitted it with a 9 mil (.009 inch) spacer to accommodate my thin bifolder views. Above it in this photo is the old spacer --for mounting trimmed print pairs onto .050" thick mat board cards. This jig is made of 1/4 inch and 3/32 inch Plexiglas. That guide at the bottom spaces the print pair a level 1/8th inch from the bottom edge of the card^.
* Treat yourself to a digital caliper for gauging paper thickness. Last I checked, they were less than $15 at Harbor Freight
^ 1/8th inch isn't much, so most stereo pairs end up rather low on the card --but: take a look at traditional and newer stereoscopes (like the Red Wing Viewer): the centers of their lenses are lower than the 1-3/4 inch high center of a traditional (3.5" x 7") stereograph.
* Jig #1 can function as your hold-down "3rd hand" by judiciously snugging up your card's fit under the guide's lip. Do that with two little strips of (.003 inch) "Post-a-Note" --as shown:
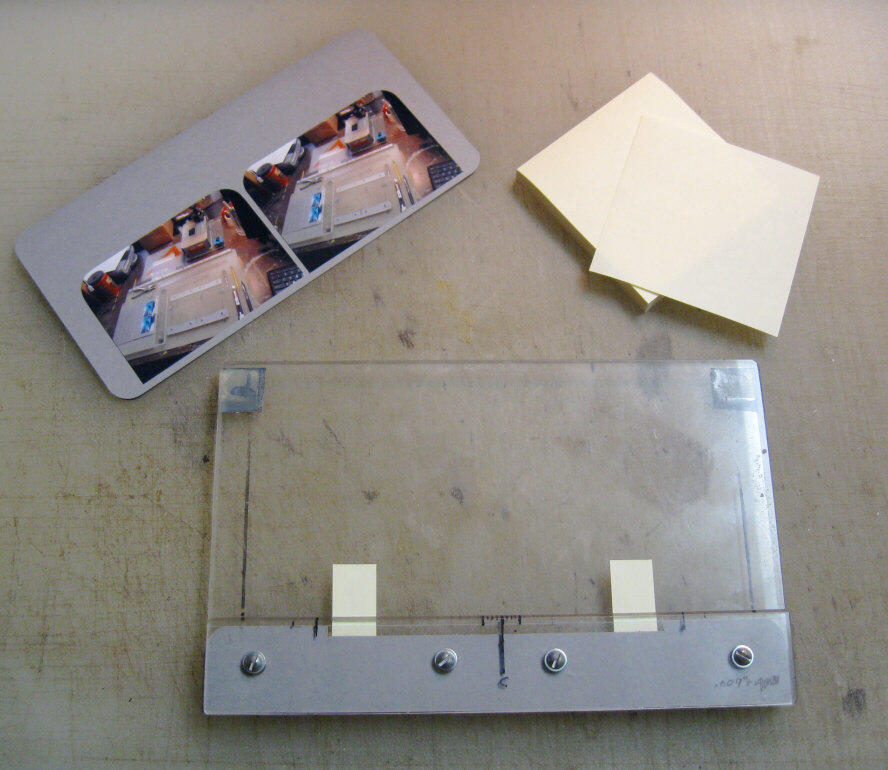
--sticky side down --and making them wider for a tighter fit. (Yes: that's a 7" wide view.)* You can build your own #1 mounting jig (by looking at these photos) or build the simpler alternative (#2), which uses a little spacer for placing the trimmed print pair.
* I'm guessing that today's stereo newbie is likely to be using a smart phone and taking it to Walgreens for 4x6 prints, maybe graduating to an at-home 4x6 printer --so that's what I'm working with --"in solidarity" with those imagined newbies. Having selected a Canon CP-1300 (makes great dye-sublimation prints but has poor menu-ing in my opinion), but I suggest that you check out other brands).
* I found it darned hard to trim dye-sub prints with carpet tape applied, so I've gone to Elmer's brand ("2X") glue sticks.
* Borderless "4-up" prints, trimmed for mounting to 5" wide bifolders or 3x5 cards --seems to be the future here.
Digital Stereography
